

What’s supported
Supported actions
This connector supports:- Read Actions, including full historic backfill. Incremental reading is supported for the objects marked in the table below, a full read of the Ramp instance will be done per scheduled read.
- Write Actions.
- Proxy Actions, using the base URL
https://api.ramp.com.
Supported objects
The Ramp connector supports the following objects:| Object | Read | Write | Incremental read |
|---|
Example integration
For an example manifest file of a Ramp integration, visit our samples repo on GitHub.Before you get started
To connect Ramp with Ampersand, you will need a Ramp account. Once your account is created, you’ll need to create an app in your Ramp portal, configure the app, and obtain the following credentials from your app:- Client ID
- Client Secret
- Scopes
Create a Ramp account
To create an account for your organization, you need to apply here Ramp Support. An active account is required to log into your portal.Creating a Ramp app
Once your Ramp account is set up, you can follow the steps below to create a Ramp app:- Log in to your Ramp Portal.
-
Navigate to
https://app.ramp.com/ramp-developer. - Click the New app.
-
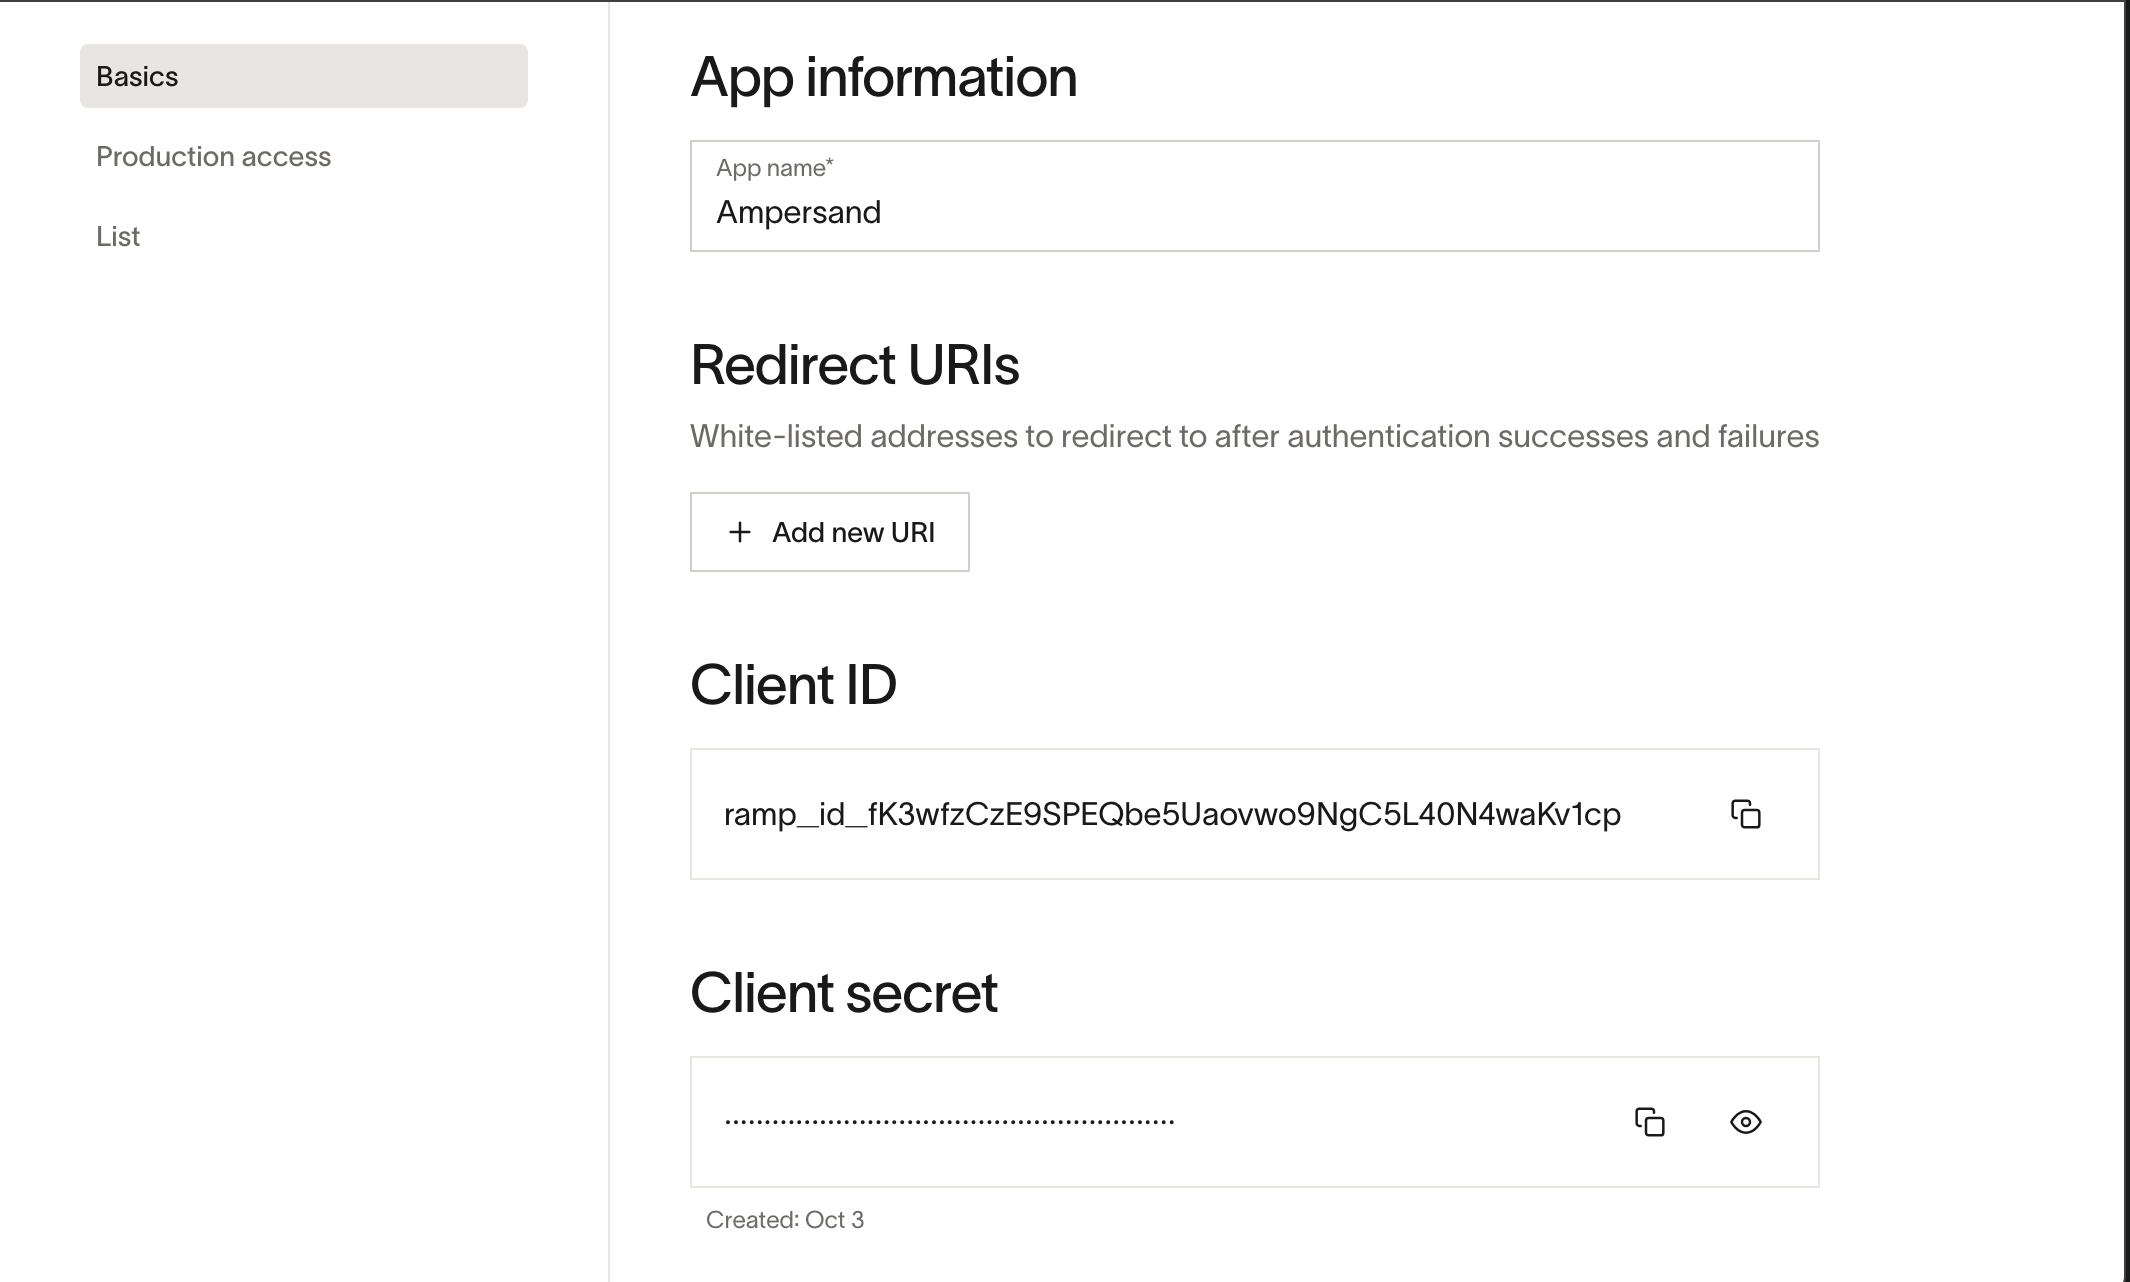
Enter the following details to register your Oauth app:
- App Name: The name of your app.
- Click the Create App.
-
Add Redirect URIs:
https://api.withampersand.com/callbacks/v1/oauth -
Select the scopes for your application. Ramp will authorize access to the selected scopes for your application. Make sure to select a scope for every object your integration reads from or writes to — for example,
transactions:readfor readingtransactions, andbills:writefor writingbills.
Add your Ramp app info to Ampersand
- Log in to your Ampersand Dashboard.
-
Select the project where you want to create a Ramp integration.

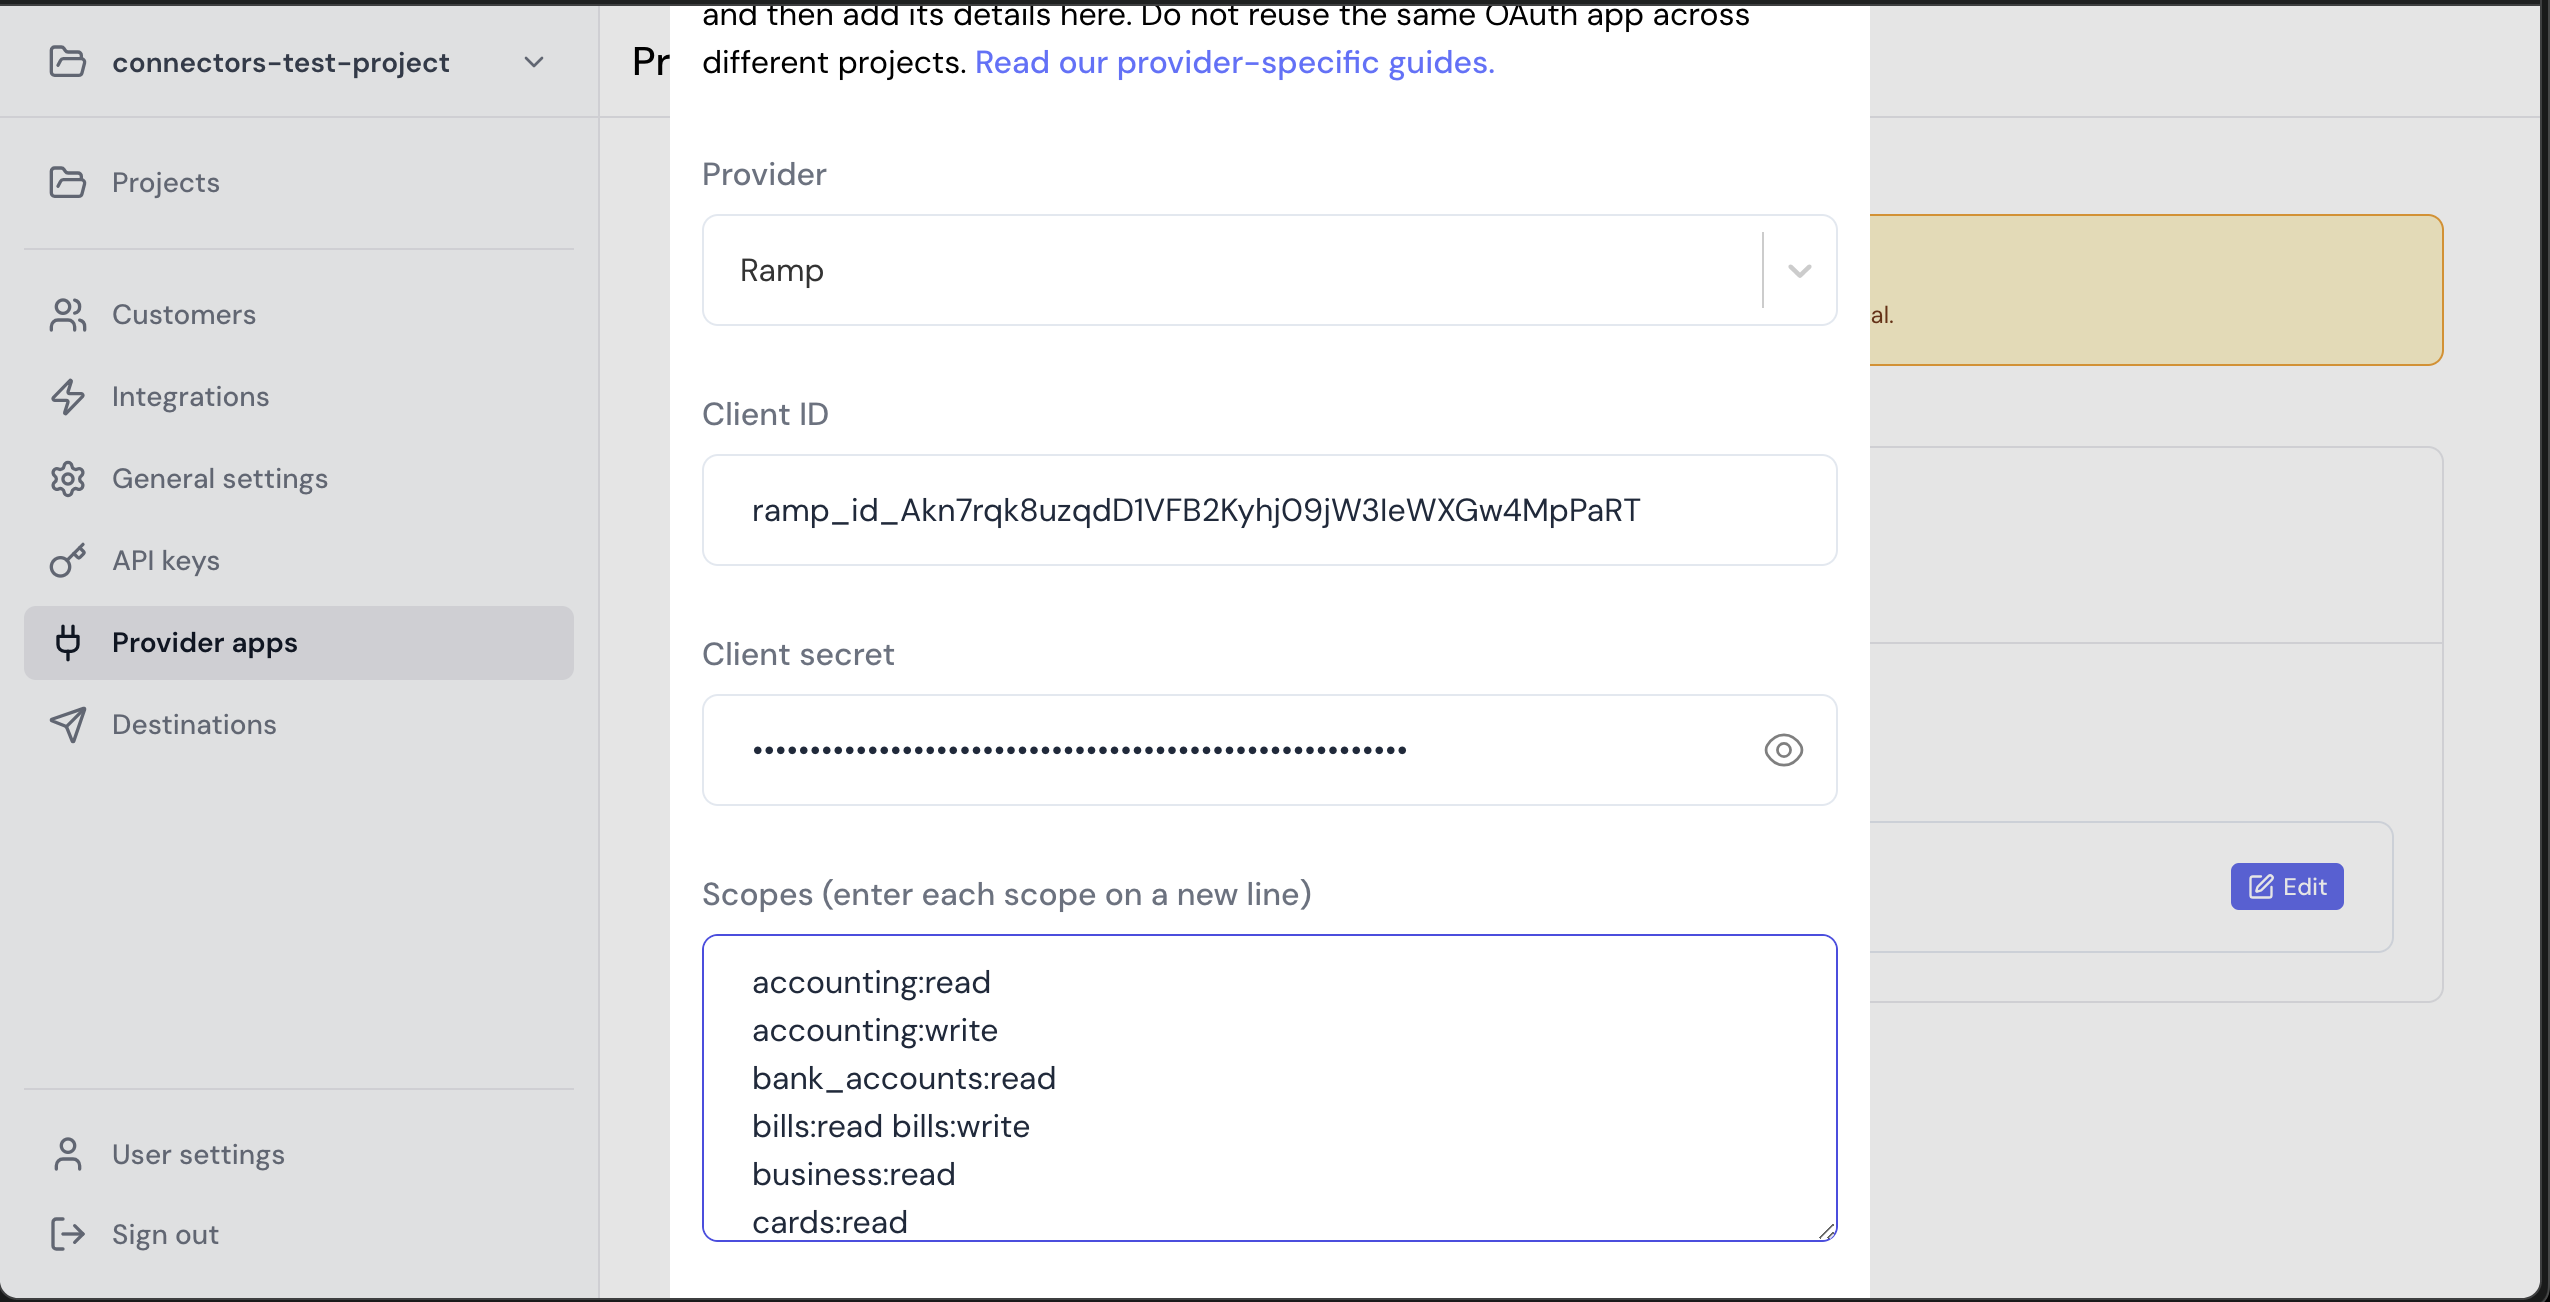
- Select Provider Apps.
- Select Ramp from the Provider list.
- Enter the previously obtained Client ID in the Client ID field and the Client Secret in the Client Secret field.
-
Enter the scopes set for your application in Ramp.
Using the connector
To start integrating with Ramp:- Create a manifest file like the example above.
- Deploy it using the amp CLI.
- If you are using Read Actions, create a destination.
- Embed the InstallIntegration UI component. The UI component will prompt the customer for OAuth authorization.
- Start using the connector!
- If your integration has Read Actions, you’ll start getting webhook messages.
- If your integration has Write Actions, you can start making API calls to our Write API.
- If your integration has Proxy Actions, you can start making Proxy API calls.