

What’s supported
Supported actions
This connector supports:- Read Actions, including full historic backfill. Incremental reading is supported for the objects marked in the table below. For all other objects, a full read of the Mailgun instance will be done per scheduled read.
- Write Actions.
- Proxy Actions, using the base URL
https://api.mailgun.net.
Supported objects
The Mailgun connector supports the following objects:| Object | Read | Write | Incremental read |
|---|
Some objects have write limits:
-
messages,bounces,complaints,unsubscribes, andwhitelistscan be created but not updated. -
messagesandlists/memberscan’t be deleted. -
To write to
lists/members, include alist_addressfield with the address of the mailing list. For example:
Example integration
For an example manifest file of a Mailgun integration, visit our samples repo on GitHub.Before you get started
To connect Mailgun with Ampersand, you will need a Mailgun account.Creating an API key for Mailgun
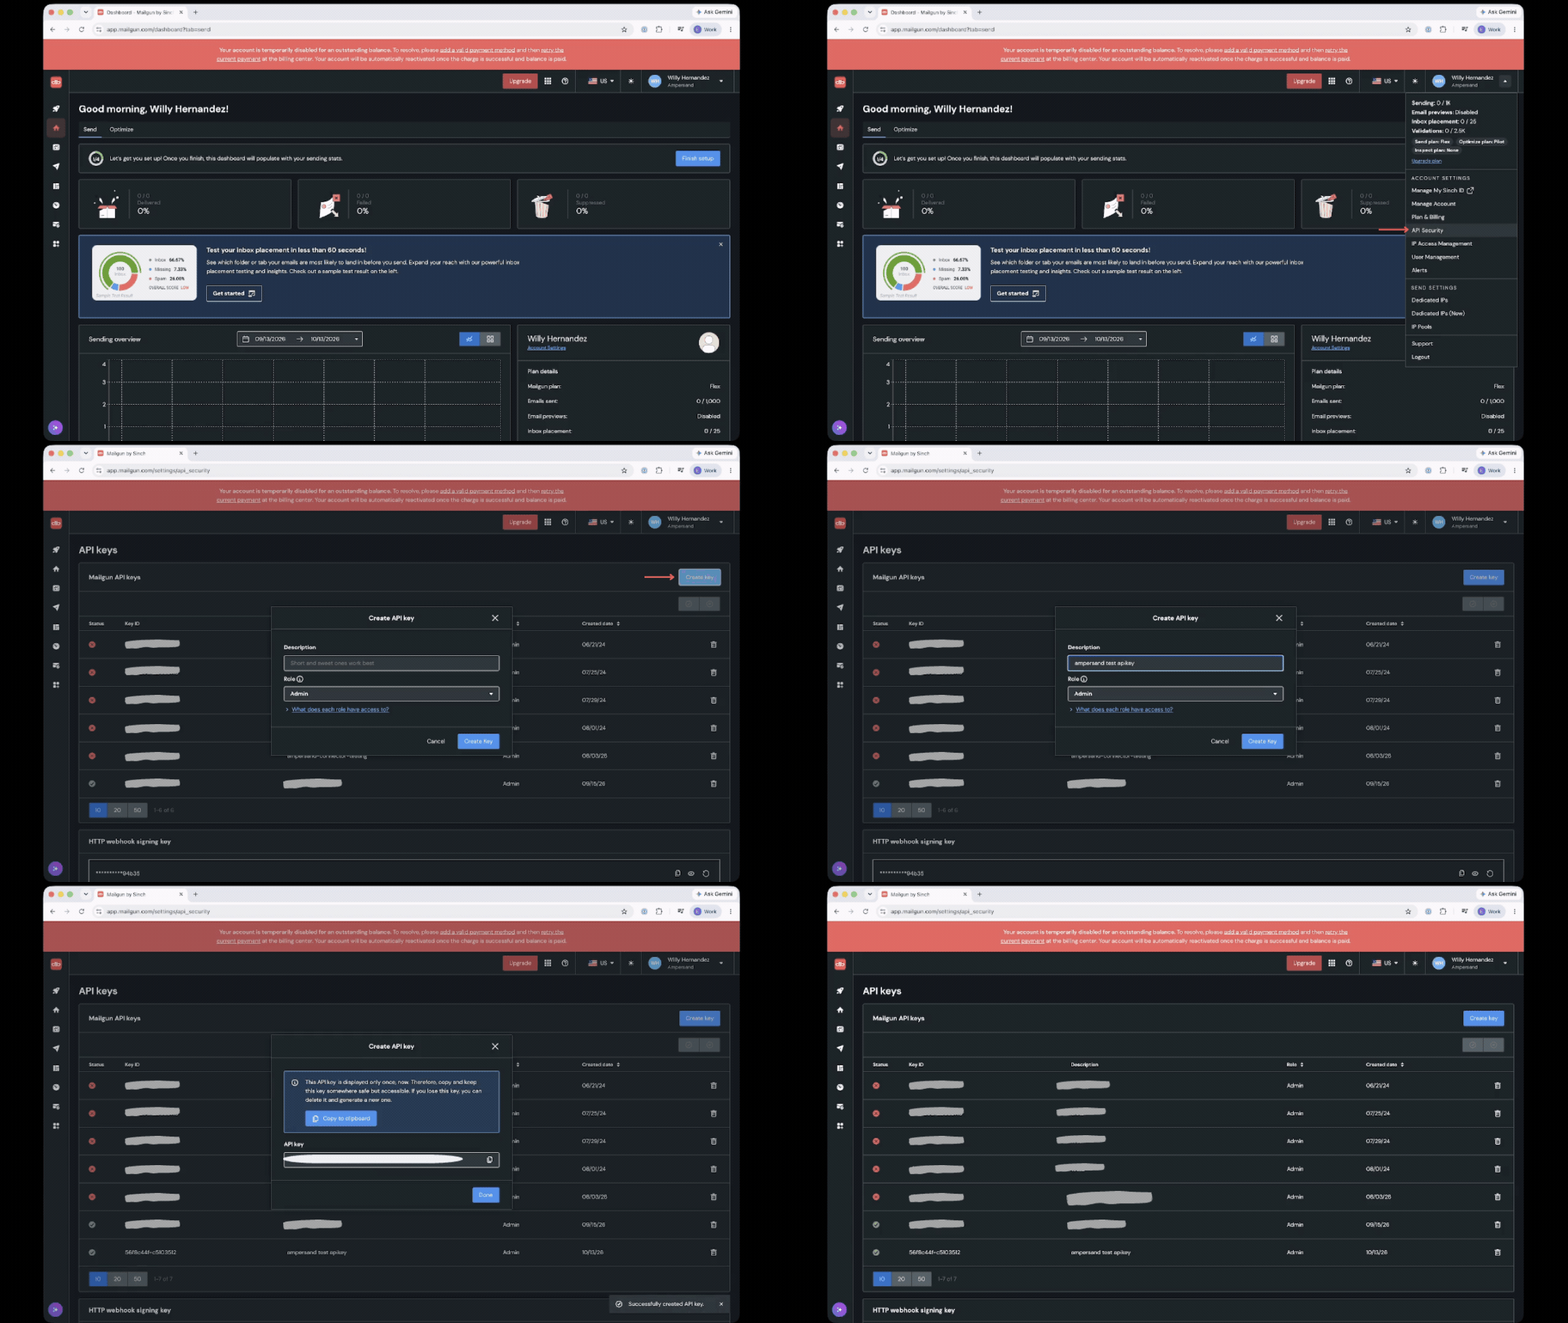
- Log in to the Mailgun dashboard.
- Go to Account Settings > API keys and click Create key. If your plan supports key roles, choose Admin or Developer so the key can read and write.
- Copy the key. Mailgun shows it only once.
- Domain name: the Mailgun sending domain, as listed under Sending > Domains in the Mailgun dashboard (for example,
mg.example.com). It is used by domain-scoped objects such asbounces,messages, andtemplates. - Region:
us(default) oreu, matching the region the domain was created in. Proxy Actions always use the US base URL.
Using the connector
This connector uses Basic Auth, which means that you do not need to set up a Provider App before getting started. (Provider apps are only required for providers that use OAuth2 Authorization Code grant type.) To start integrating with Mailgun:- Create a manifest file like the example above.
- Deploy it using the amp CLI.
- If you are using Read Actions, create a destination.
- Embed the InstallIntegration UI component. The UI component will prompt the customer for their username and password, Mailgun domain name, and region.
- Start using the connector!
- If your integration has Read Actions, you’ll start getting webhook messages.
- If your integration has Write Actions, you can start making API calls to our Write API.
- If your integration has Proxy Actions, you can start making Proxy API calls.
Credential format for Mailgun
Mailgun uses HTTP Basic Authentication with a non-standard credential format. The fields in the installation UI do not correspond to a Mailgun login. Instead:- Username: Always
api. - Password: The Mailgun API key.