

What’s supported
Supported actions
This connector supports:- Read Actions, including full historic backfill. Incremental reading is supported for the objects listed below. For all other objects, a full read of the Okta instance will be done per scheduled read.
- Write Actions.
- Proxy Actions, using the base URL
https://{{.workspace}}.okta.com.
Supported objects
The Okta connector supports reading from the following objects:- apps (supports incremental read)
- authenticators (supports incremental read)
- authorizationServers (supports incremental read)
- brands
- devices (supports incremental read)
- domains
- eventHooks (supports incremental read)
- features
- groups (supports incremental read)
- idps (supports incremental read)
- logs (supports incremental read)
- policies (supports incremental read)
- trustedOrigins (supports incremental read)
- users (supports incremental read)
- zones (supports incremental read)
Example integration
For an example manifest file of an Okta integration, visit our samples repo on GitHub.Before you get started
To connect Okta with Ampersand, you will need an Okta account. Once your account is created, you’ll need to create an OAuth 2.0 app in Okta and obtain the following credentials:- Client ID
- Client Secret
- Scopes
Create an Okta account
Here’s how you can sign up for an Okta developer account:- Go to the Okta Developer Sign Up page and create an account.
- Complete the registration process and verify your email.
Creating an Okta app
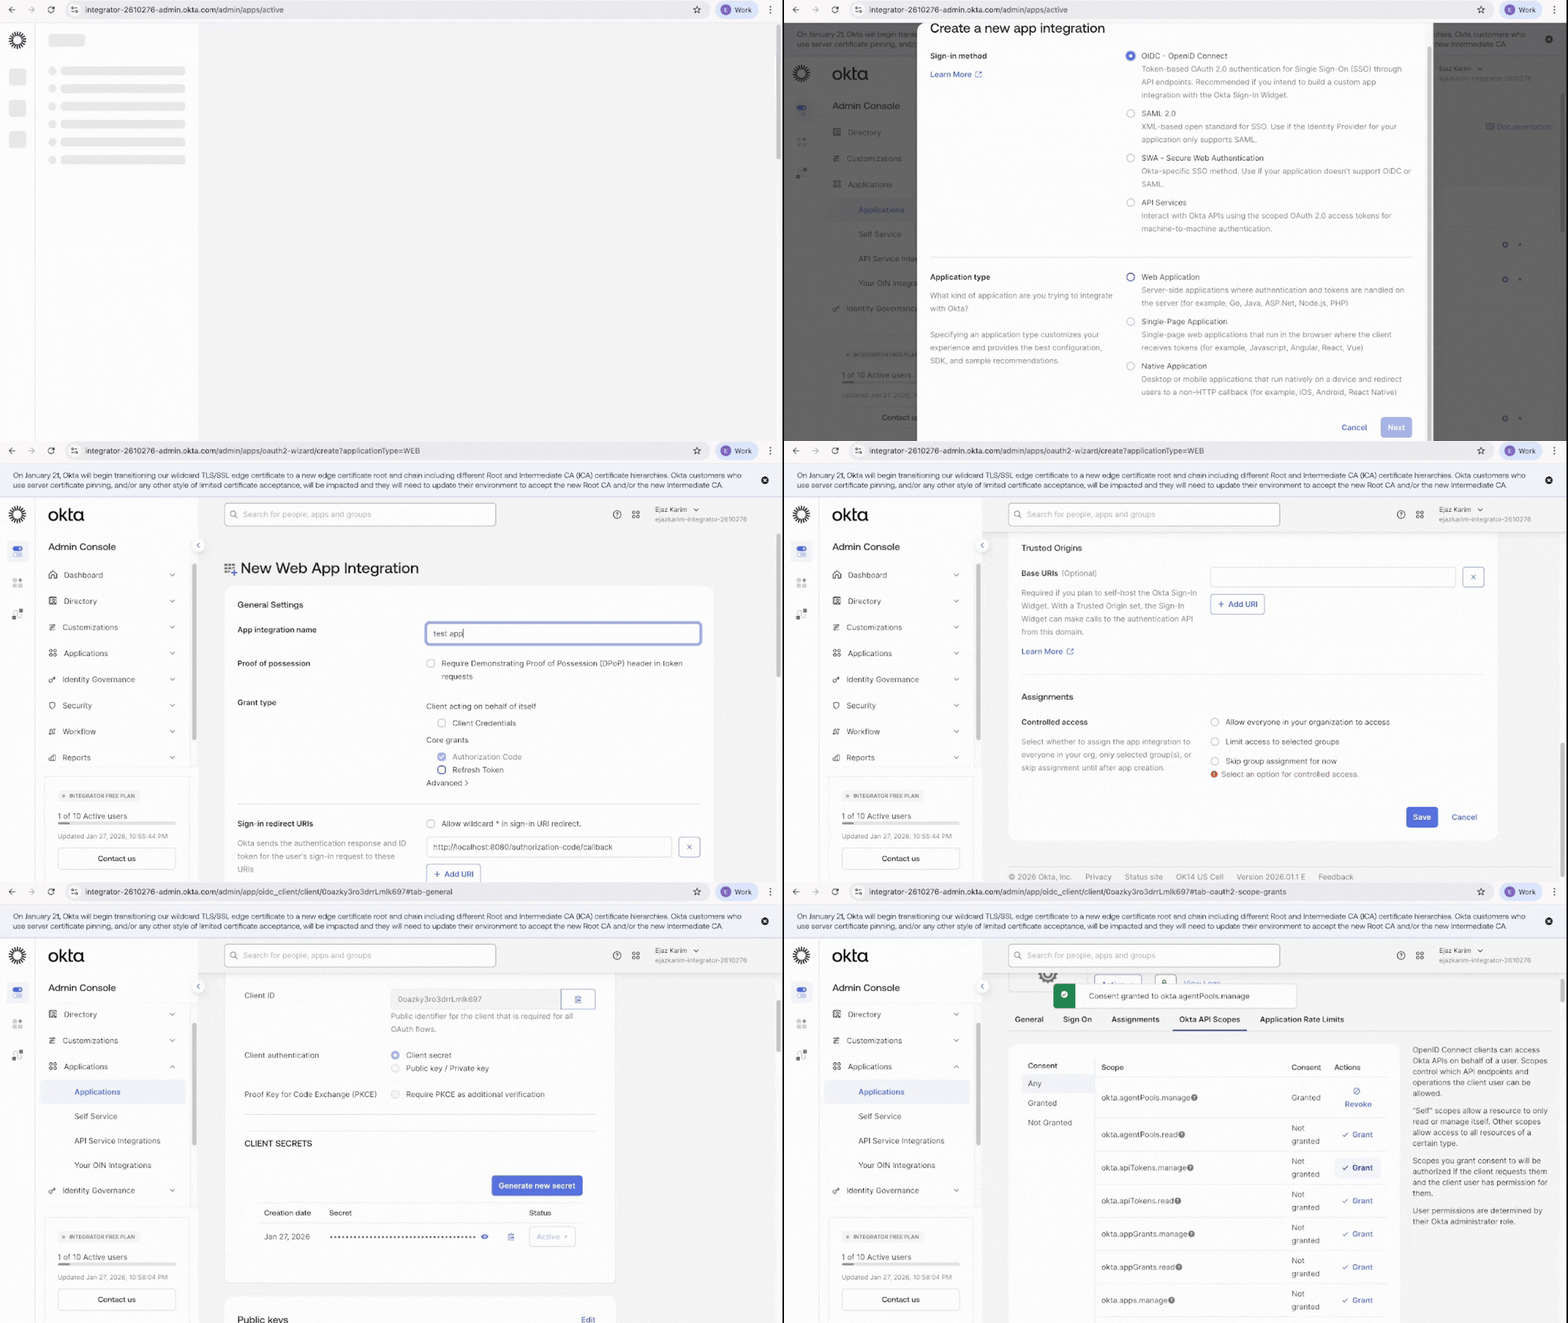
Follow the steps below to create an OAuth 2.0 app in Okta:- Sign in to your Okta Admin Console.
- Navigate to Applications > Applications in the left sidebar.
- Click Create App Integration.
- Select OIDC - OpenID Connect as the sign-in method.
- Select Web Application as the application type and click Next.
- Enter a descriptive App integration name.
- In the Sign-in redirect URIs field, enter the Ampersand redirect URL:
https://api.withampersand.com/callbacks/v1/oauth - Click Save.
Add your Okta app info to Ampersand
- Log in to your Ampersand Dashboard.
-
Select the project where you want to create an Okta integration.

- Select Provider Apps.
- Select Okta from the Provider list.
- Enter the Client ID and Client Secret obtained from your Okta app.
-
Enter the scopes set for your application in Okta. For a list of available scopes, refer to the Okta documentation.
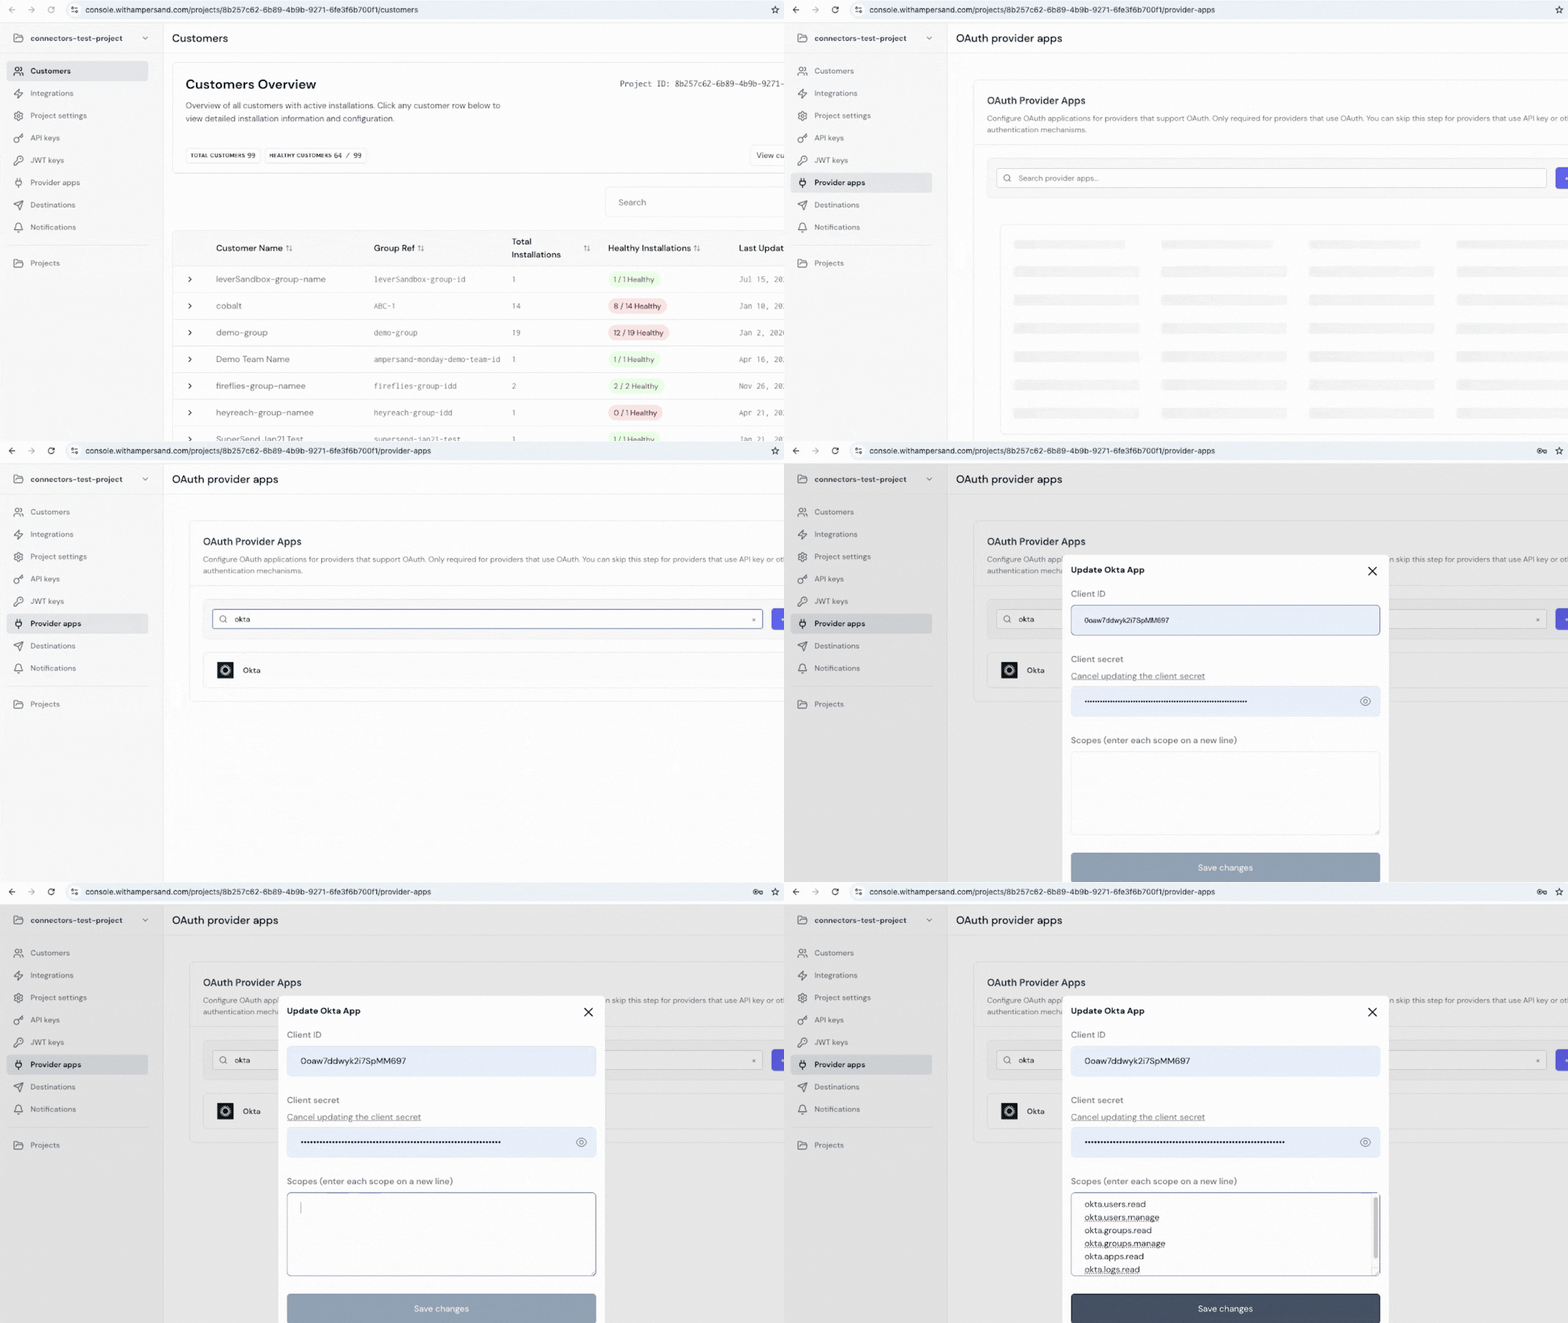
- Click Save Changes.
Using the connector
To start integrating with Okta:- Create a manifest file like the example above.
- Deploy it using the amp CLI.
- If you are using Read Actions, create a destination.
- Embed the InstallIntegration UI component. The UI component will prompt the customer for OAuth authorization.
- Start using the connector!
- If your integration has Read Actions, you’ll start getting webhook messages.
- If your integration has Write Actions, you can start making API calls to our Write API.
- If your integration has Proxy Actions, you can start making Proxy API calls.